
What Is Grout Hazing? Causes, Fixes, and Prevention
TL;DR:
- Grout haze is a chemically bonded film of cement or epoxy residue left on tiles after grouting. Removing it within 24 to 72 hours with proper cleaners prevents damage and maintains tile appearance. Proper installation practices, such as the two-bucket method and timely cleaning, are essential to prevent grout haze formation.
Grout haze is defined as a thin film of cementitious or epoxy residue left on tile surfaces after grouting. The industry term is "grout haze," and it is not simply dirt. Nearly 25% of homeowners experience it after a tile installation, making it one of the most common post-installation problems you will face. Left untreated, grout haze dulls your tile finish, traps moisture, and disrupts tile water repellency and stain resistance. Understanding what causes it, how to identify it, and how to remove it safely is the fastest path to restoring your tile's original appearance.
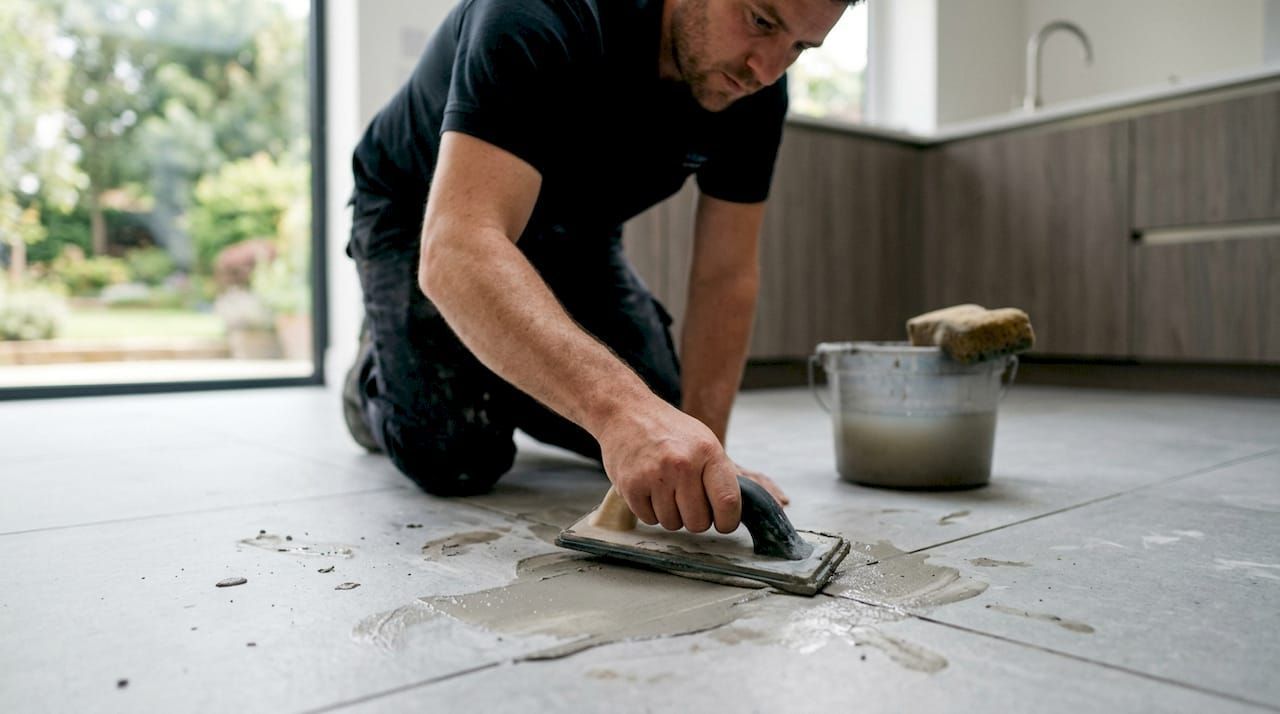
What is grout hazing and why does it form?
Grout haze forms when grout residue is not fully removed from the tile face during installation. As the grout cures, that residue bonds to the surface and hardens into a mineral or resin film. Once grout cures beyond 24–72 hours, it binds strongly to the tile and requires specialized removal. That window is short, and most homeowners miss it.
Several specific factors drive haze formation:
- Improper grout mixing. Poor mixing accounts for nearly 30% of grout haze cases. Grout that is too wet or too dry spreads unevenly and leaves heavier residue on the tile face.
- Contaminated rinse water. Rinsing tiles with dirty water redeposits dissolved grout back onto the surface. This is one of the most overlooked causes.
- Skipping the two-bucket method. Using a single bucket means your rinse water becomes saturated with grout particles quickly. That cloudy water goes right back onto your tiles.
- Grouting too large an area at once. Covering too much floor before cleaning gives the grout time to set on the tile surface.
- Tile surface texture. Rough, matte, or porous tiles trap grout particles more aggressively than smooth, glazed tiles.
Grout type also matters. Cementitious grout leaves a mineral film. Epoxy grout leaves a resin film. Both look similar on the surface, but they require completely different removal approaches.
Pro Tip: Mix grout to a peanut butter consistency. If it slides off your float too easily, it is too wet and will leave a heavier haze.
How do you identify grout haze versus dirt or discoloration?
Grout haze has a distinct look and feel that sets it apart from ordinary dirt. Knowing the difference saves you from using the wrong cleaner and making the problem worse.
Visual signs of grout haze include:
- A dull, milky, or chalky film across the tile face
- Streaky or cloudy patches, especially visible on glossy or polished tiles
- A uniform haze that follows the grouting pattern rather than random dirt spots
- Whitish residue that does not respond to a standard wipe-down with a damp cloth
The tactile test is equally telling. Run your finger across the tile. Grout haze feels slightly rough or powdery, like a fine grit. Regular dirt wipes away cleanly. Grout haze does not.
Timing is the most reliable diagnostic tool. If the film appeared within 24–72 hours of grouting, it is almost certainly grout haze. Grout haze is often mistaken for dirt, and that misidentification leads homeowners to scrub harder with general cleaners, which does nothing to dissolve the mineral or resin bond.
Pro Tip: Spray a small area with water and let it dry. If the haze becomes more visible as the water evaporates, you are looking at mineral residue, not surface dirt.
One more thing worth knowing: 68% of surface biofilms in tiling projects originate from unremoved grout haze. The residue traps moisture and organic debris, which creates conditions for biofilm growth over time. This is not just a cosmetic problem.
How to remove grout haze safely at home
Grout haze removal follows a clear sequence. Skipping steps or jumping straight to strong chemicals causes permanent damage, especially on natural stone.
Step-by-step removal process
- Dry buff first. Use a clean, dry microfiber cloth or a white nylon scrub pad to buff the tile surface. This removes loose, powdery haze before you introduce any moisture.
- Warm water wash. Dampen a clean mop or cloth with warm water and wipe the tiles. Change your rinse water frequently. This handles light, fresh haze.
- Apply a pH-neutral cleaner. For haze that survives the water wash, use a pH-neutral tile cleaner. Work in small sections and rinse thoroughly. A pH-neutral tile cleaner is safe for glazed ceramic, porcelain, and most natural stone.
- Use a specialized haze remover for stubborn cases. A purpose-built grout haze remover dissolves the mineral film without attacking the tile surface.
- Rinse and dry completely. After cleaning, rinse with clean water and dry the surface. Residual cleaner left on the tile can itself cause streaking.
Cementitious vs. epoxy haze removal
| Haze type | Cleaner type | Key caution |
|---|---|---|
| Cementitious (cement-based grout) | pH-neutral or mild acidic cleaner | Never use acid on natural stone or marble |
| Epoxy grout haze | Solvent-based specialized remover | Must be applied within the cure window |
Epoxy grout haze differs chemically from cementitious haze and requires solvent-based removers. Standard tile cleaners will not touch it. If you used epoxy grout and notice haze, act fast. Once epoxy fully cures, removal becomes extremely difficult.
Using acid cleaners on natural stone causes permanent etching. Marble, travertine, and limestone are all acid-sensitive. A pH-neutral or alkaline cleaner is the only safe choice for those surfaces.
Pro Tip: Always test your chosen cleaner on a small, hidden tile before treating the full floor. A 6-inch test patch takes two minutes and can save your entire installation.
How to prevent grout haze during installation
Prevention is faster and cheaper than removal. The right habits during installation eliminate most grout haze before it starts.
- Clean within the cure window. Start wiping tiles within 15–30 minutes of applying grout. Do not wait until the full floor is grouted. The 24–72 hour window is when haze is still soft enough to remove with water and a cloth.
- Use the two-bucket method. Keep one bucket for rinsing your sponge and a second bucket with clean water for the final wipe. Two buckets prevent redepositing grout residue back onto the tile face.
- Work in small sections. Limit grouting to 2–3 square meters at a time. Smaller sections let you clean before the grout sets on the tile surface.
- Pre-wet the tiles. Lightly dampening tiles before grouting reduces how aggressively grout sticks to the surface. This is especially useful on porous or textured tiles.
- Avoid harsh chemicals during grouting. Strong cleaners used during installation can open the tile surface and make it more prone to absorbing grout residue.
- Seal only after haze is fully removed. Sealing over haze locks the residue in permanently. Always confirm the tile face is clean before applying any stone or grout sealer.
Pro Tip: Keep a spray bottle of clean water and a stack of dry microfiber cloths at your side while grouting. Wipe each section immediately after tooling the joints.
For a deeper look at long-term tile care after installation, the right maintenance routine makes a real difference in how your tiles hold up over years.
Key takeaways
Grout haze is a chemically bonded mineral or resin film that requires the right cleaner, applied within the right time window, to remove without damaging your tile.
| Point | Details |
|---|---|
| Act within 24–72 hours | Fresh haze removes with water and a cloth; cured haze needs specialized cleaners. |
| Match cleaner to grout type | Epoxy haze needs solvent-based removers; cementitious haze responds to pH-neutral cleaners. |
| Never use acid on natural stone | Acid cleaners permanently etch marble, travertine, and limestone surfaces. |
| Two-bucket method prevents haze | Clean rinse water stops grout residue from redepositing onto tile faces during installation. |
| Seal only after haze is gone | Sealing over residue locks it in permanently and ruins the tile finish. |
Why I think most homeowners get grout haze wrong
Most homeowners I talk to make the same mistake: they wait. They finish grouting, admire the work, and plan to clean up the next day. By then, the haze has cured and a damp mop does nothing. The frustration that follows leads to scrubbing with whatever cleaner is under the sink, which either does nothing or damages the tile.
The second mistake is treating all grout haze the same. Cement-based haze and epoxy haze are chemically different problems. Using a general-purpose cleaner on epoxy haze is like trying to dissolve superglue with dish soap.
My honest advice: prevention costs you 20 minutes during installation. Removal can cost you hours and the wrong product can cost you the tile. Prioritize the two-bucket method and small-section grouting every single time. And if you are dealing with natural stone, skip the acidic cleaners entirely. The risk of permanent etching is not worth it. A safe cleaner for natural stone is not a luxury. It is the only option that does not create a second problem while solving the first.
Oceancarestore's tile cleaners for grout haze at home
Grout haze removal does not require harsh chemicals. Oceancarestore carries a range of pH-neutral, biodegradable cleaners built specifically for tile and natural stone surfaces.
The home essential cleaners collection includes daily-use and deep-clean options safe for ceramic, porcelain, marble, and travertine. Every formula is plant-based and low VOC, so you are not trading a clean tile for a chemical-heavy home. Whether you are tackling fresh haze or stubborn cured residue, Oceancarestore's eco-friendly cleaning range gives you the right tool for the job without risking your tile surface.
FAQ
What is grout haze exactly?
Grout haze is a thin film of cementitious or epoxy residue left on tile surfaces after grouting. It is chemically bonded to the tile and does not wipe away like ordinary dirt.
How long do you have to remove grout haze?
The effective removal window is 24–72 hours after grouting. After that, the haze cures and bonds strongly to the tile, requiring specialized cleaners rather than water alone.
Can I use vinegar to remove grout haze?
Vinegar works on light cementitious haze on glazed ceramic or porcelain, but it permanently etches acid-sensitive natural stone like marble and travertine. A pH-neutral cleaner is the safer choice for most tile types.
What is the difference between cementitious and epoxy grout haze?
Cementitious haze is a mineral film that responds to pH-neutral or mild acidic cleaners. Epoxy haze is a resin film that requires solvent-based removers and must be treated before the epoxy fully cures.
Does grout haze cause any damage beyond appearance?
Yes. Grout haze disrupts tile water repellency and stain resistance, and unremoved residue traps moisture that promotes biofilm growth over time.

